Sunday, October 21, 2012

Despicable Me Cake

Last week was my cousin Elijah's birthday and so as he requested he wanted to have a costume party, he got what he wanted + a cake of his chosen character. Ok! well not actually his chosen character but his chosen movie. He made it pretty clear wants to be that Dr. Nefario in the movie Despicable Me but since it was too difficult to make, I'll just stick with the main characters hehehe...


Here's the two tier cake I made and which I love making since its the first time i made a cake using that upside down ganache technique I got from Jessica's blog. 
It was so freaking easy! I swear and I'm never going back to that old classic way of frosting my cakes. ha!


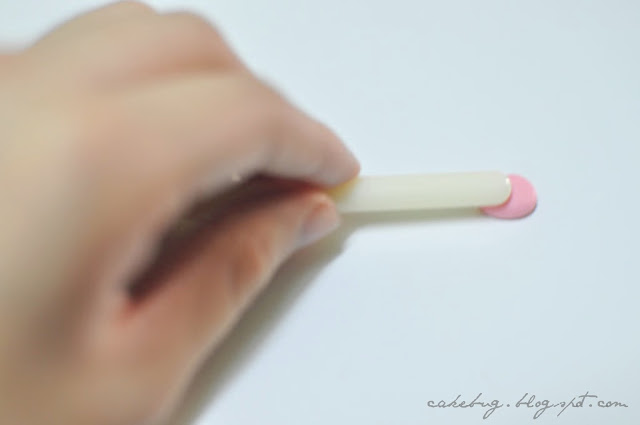
And oh! Here's Agnes! So cute! If you're wondering how I made her standing up that straight, well...
I skewered here with a bbq stick all the way through. And when I say all the way, I mean from the head... to the bottom of that cake!yeah?

"It's so fluffy I'm gonna die!"


If you just happen to recognize.. hehe my horizontal stripes are not perfect.. well! It gave me a hard time since its my first ever! time to do this technique which I learned from Jessica here. She made her look soo easy hehe but I know it's the best technique you can use when doing these stripes.


Everyone meet Elijah! my fat cousin oh I forgot! He's not Elijah, he's Dr. Nefario. yeah!


Lastly, a close-up of Mr. gru and the Minions. Aren't they so cute?

Hope you enjoyed the cake!
God bless!

XOXO

Arah♥♥♥


Tuesday, October 16, 2012

How to Make Hello Kitty Cupcake Toppers

Cakers have been talking about short notice orders over WayBeyondCakesByMayen this morning then I remembered these Hello Kitty cupcake order which I got notice just the night before. Good thing the girl is my friend so I just can't say no. 

Since this is made upon such short notice, I didn't have Hello kitty cutters which will save up much time from decorating. Here are some tips how you can make these gorgeous toppers without the perfect tools.

What we need
Fondant in pink, white, black, yellow
Rolling pin
Modelling tools
Blade or Exacto Tool
Edible Glue and brush
Americolor Super black or Edible writer
Hello Kitty Face Pattern
Start by printing Hello Kitty on a hard type of paper and cutting it. Using this cut-out as a pattern on your rolled white fondant, trace your blade through the edges of the image. Make sure that you place your White rolled fondant on a wax paper with a thin smear of Crisco before cutting to prevent the fondant from moving while your cutting it.

Here's an image you can use for printing
Tippies: 
If your going to make large amount of Hello Kitty topper, you can also buy a Hello Kitty fondant cutter here.


To make the bow, roll out your pink fondant or gumpaste and cut 5x5 cm to make even sized balls. I always use this technique to make sure that the balls are even in sizes.

I know that the balls still have creases but not to worry, you will flatten this balls and those creases will be covered by the sprinkled later.


Flatten the pink balls


..and pinch the other end  to make it look like the other piece of the ribbon.


Using your ball tool or any round- ended tool, make a dent in the middle of the fondant.


Brush the spot where the bow is going to be placed. Jazz it up with some sprinkles and non pareils.


Be very careful when using a blade. I cut the blade in half to prevent cutting myself with the other end.
Using this sharp blade, there's no need to roll the fondant into a ball again because the cut is already perfect.


Hello Kitty won't be a kitty without those whiskers yeah? So draw those whiskers with you edible pen writer or using black color gel and really fine paint brush only used for this purpose, of course. Easy peasy!


And.. Voila! Hello Kitty  CupcakeToppers! So much fun to make in a few easy steps. 

Have a happy Midweek everyone!

And if you have some questions or suggestion, feel free to leave a comment here or on my facebook page here
XOXO

Arah♥♥♥


Thursday, October 11, 2012

Raspberry Mille-feuille


Mille- Feuille- noun \mēl-ˈfwē, mēl-ˈfœ-ē\

I bet it left you clueless as well like me. But hey this dessert is actually easier than learning how it is pronounced.( I just wish I know how to speak french yeah?) 
 Mille - Feuille is a french term of a classic dessert Napoleon. See now we're talking!

Napoleon is actually composed of pastry layers and cream or custard. But after watching last night's episode of Baking Made Easy by Lorraine Pascal on Lifestyle Channel, I couldn't take my mind off of it.

So I told myself: "Let's make it!!"

Ingeredients:
1 recipe of puff pastry 
raspberries
whipping cream
1 lemon
flour or icing sugar for dusting
baking paper and baking sheet
rolling pin
knife

So exciting! Let's begin 


 1. Roll out your puff pastry on a dusted surface until you reach your desired thinness, about 1/4 inch. Make sure its chilled and thawed for 3 minutes.

Tippies:
* Don't ever remove the cling wrap or whatever it is covering your puff until thawed or else it will condensate and you wouldn't want water on your pastry dough.
*It is easier to roll the dough in between two sheets of cling wrap. Then every time, release the dough from the wrap for the dough to flatten easily (A tip from Martha Stewart)


 2. Sprinkle with flour or icing sugar every time needed to prevent the dough from sticking to the cling wrap.

Mental note; Next time I'll just use flour for dusting. Icing sugar caramelized the puff while cooking.

 3. After you reach the thinness you desire, cut the dough using your sparing knife into uniform slices.

Tippies:
*Cut the dough with a bigger knife and don't slide the knife through the dough. Just cut it through! It might ruin those beautiful layers of the puff and might hinder the puffing. Hehe I like the word puffing


 Didn't I just tell you about the caramelization? Well it added a signature crunch that I also liked. soo no regrets!
 See those nice ice flaky layers?.. I can't help it! It's so fragrant that I took a bite once it came out of the oven! haha I guess not only a bite I might just ate too much.
 4. Make your whipping cream.
I don't keep any recipe of whipping cream for no other reason than it's so easy to make.
Pour the cream on a clean cold bowl and add sugar to taste. Whip until you reach just medium peaks. Fold the lemon juice. Of course add it according to your taste preference. yeah?
 5. Transfer the cream to a piping bag with a round nozzle (7-10M) and pipe blobs of whipping cream on top. Garnish with raspberries

Tippies:
*You can also just snip off the end of your pastry bag if you don't have a piping tip. 


This dish was supposed to be piles of puff pastry sandwiching the lemon cream and topped with raspberry. A classic french Mille feuille. But I ran out of puff hehe because I ate some earlier. 

Hope you enjoyed our trip to Paris!

XOXO

Arah♥♥♥

Sunday, September 30, 2012

Ballerina Cake

Once I made a cake 
A cake not so perfect
And yet makes me so proud...


Tuesday, July 24, 2012

Tarty Tarts

What will you do if you received a blueberry preserve?

 Eat it with crackers? naaah.. too sweet for my taste..
Eat it with pandesal? I don't think it would go well with pandesal.
Since I haveleft over flour and butter..why don't I make some blueberry tarts? Perfect!

Here's some ingradients:
250 g/ 1 cup/8 oz all-purpose flour
125g/ 1/2 cup/ 4 oz caster sugar
125g/ 1/2 cup/ 4 oz butter, melted and cooled
2 tbsp milk
1 teaspoon lemon zest
2 egg yolks lightly beaten

filling:
canned cherries, drained
(but I used blueberry preserves)

Nothing hard to find right? You can use it with peaches, pears, strawberries.
Let's start mixing shall we?

1. To make pastry, combine flour and sugar in a bowl and make a well in the center. 
Add butter, eggs, lemon zest, and milk and mix with a spatula or knife. Turn into a floured surface and knead lightly. Cover with plastic wrap and refrigerate for 30 mins.
2. Roll out two- thirds of pastry between two sheets of plastic wrap about 1 1/2 cm thick.
3 Line pastry cases (I used cupcake tins that are greased and dusted with flour)
4.Arrange fruits in the pastry. Place remaining dough in a pastry bag with a plain nozzle an pipe over filling in a lattice pattern. Pinch edges.
5. Bake at a preheated oven at 180 C / 350 F for 25- 30 minutes. Brush warm with jam.

So eeeeaaasy to make.. Here are some pictures I captured during my tart making :)


Happy baking!

XOXO

Arah♥♥♥
Related Posts Plugin for WordPress, Blogger...